Some dinners just click. This Instant Pot Cheesy Chicken & Rice is one of those recipes that’s been on repeat in my kitchen. It’s creamy, filling, and has that cozy “big hug in a bowl” vibe. Plus, the kids don’t just eat it — they actually ask for seconds. That’s a rare win in my house.
 The first time I made this, it wasn’t planned at all. I had chicken, rice, and a fridge that looked like it had been picked over by a midnight snacker. A little of this, a little of that, and suddenly dinner was ready in under 30 minutes. Now it’s my secret weapon for those “I really don’t want to cook, but we have to eat” nights.
How This Recipe Was Born
This one came out of what I like to call my “pantry week” — the time when I challenge myself to make dinner using only what’s already in the house. I love it because it forces me to get creative, use up half-open packages, and keep my grocery bill in check.
If you’ve ever watched Chopped, you know the feeling: a basket of random ingredients and the clock ticking. That’s exactly how I felt — except the prize at the end was a full dinner table and no complaints. The beauty of this recipe is that it’s endlessly adaptable. I’ve made Mexican-inspired versions with salsa and black beans, swapped in sausage for a richer flavor, and even used leftover roast chicken when I didn’t feel like chopping raw meat.
What You’ll Need & Easy Swaps
One of the reasons I keep coming back to this recipe is how forgiving it is. You can swap, adjust, and play with the ingredients depending on what’s in your fridge.
-
Chicken – I usually grab boneless, skinless chicken breasts because they cook quickly and stay tender in the Instant Pot. If I have thighs, I’ll use those for extra flavor.
-
Rice – White rice is my go-to for speed, but brown rice works great too — just bump the pressure cooking time from 8 minutes to 15 minutes.
-
Cheese – Cheddar gives that classic comfort taste, but pepper jack adds a gentle kick. Gouda makes it extra creamy, and parmesan brings a nice salty edge.
-
Soup Base – Cream of chicken soup gives that smooth, rich texture, but cream cheese is a nice swap if you want something less “soupy.”
-
Liquid – Chicken broth is fine, but chicken stock will give you a deeper flavor.
-
Veggies – I like adding in steamed broccoli, peas, or even leftover roasted vegetables after cooking. They make the dish a little more colorful and add freshness.
Tip: If you’re cooking for kids who usually avoid veggies, stir in finely chopped carrots or cauliflower — they blend right in with the cheesy goodness.
 How to Make It Step-by-Step
Step 1: Brown the Chicken
Set your Instant Pot to sauté, melt a little butter, and cook the chicken until it’s lightly golden. Season with salt and pepper right away so the flavor soaks in. This step is quick — about 7 minutes — but makes a big difference in the final flavor.
Step 2: Add Aromatics
Toss in chopped onion and garlic. Cook until the onion softens and your kitchen smells amazing. Don’t rush this — a couple of extra minutes here makes everything taste better.
Step 3: Toast the Rice
Stir the rice into the buttered chicken mixture and let it toast for 1–2 minutes. This adds a subtle nuttiness. Pour in your broth and scrape up the browned bits from the bottom — those are pure flavor gold.
Step 4: Pressure Cook
Seal the lid and cook on high pressure: 8 minutes for white rice, 15 for brown. Quick release the steam when it’s done.
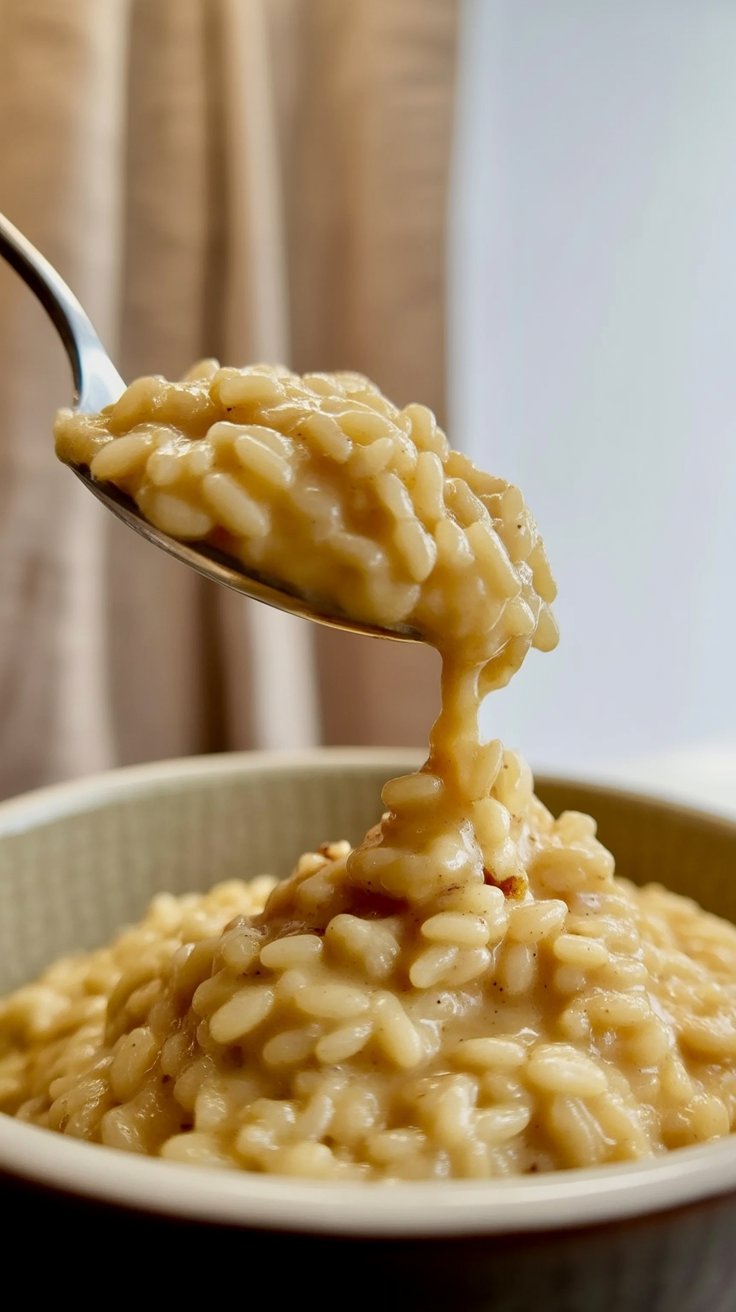
Step 5: Make It Cheesy
Stir in the cream of chicken soup and shredded cheese. Keep stirring until it’s smooth and creamy. This is the point where everyone starts hovering around the kitchen asking when dinner will be ready.
My Tips for the Best Cheesy Chicken & Rice
-
Don’t skip the toasting step for the rice — it keeps it from getting mushy.
-
Use freshly grated cheese if you can. Pre-shredded works, but it has anti-caking agents that can affect the creaminess.
-
Add veggies after cooking if you want them to keep their texture and color.
-
If you’re making a bigger batch, double the recipe but keep the cooking time the same.
Storing & Reheating
This dish keeps well in the fridge for 3–4 days. I sometimes store it right in the Instant Pot insert with a glass lid so I can pop it back in for reheating.
For freezing, let it cool completely, then pack it in an airtight container. It’ll last up to 6 months. When you’re ready to eat, thaw overnight in the fridge and bake at 350°F for about an hour, covered, then uncover for the last 10 minutes to freshen up the texture.

 What to Serve With It
Cheesy Chicken & Rice is pretty filling on its own, but I love to round it out with something fresh or crunchy. Roasted broccoli, peas, or a crisp green salad are my top picks. Sometimes I serve it with crusty bread for mopping up the extra sauce.
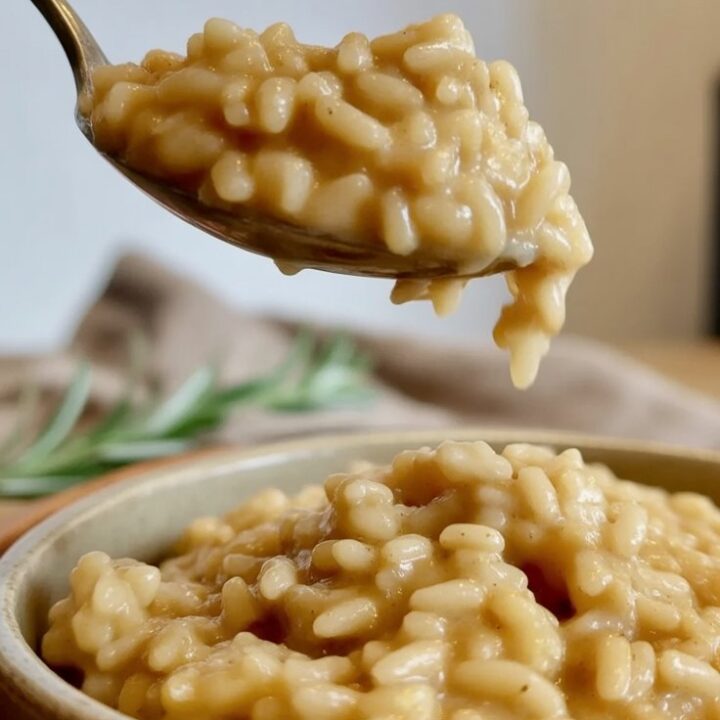
Instant Pot Cheesy Chicken and Rice
Creamy, cheesy, and downright comforting—this one-pot wonder is weeknight dinner magic. Tender chicken, perfectly cooked rice, and melty cheese come together in under 40 minutes. Bonus: it’s kid-approved and freezer-friendly!
Ingredients
- 1 lb boneless, skinless chicken breasts (or thighs), cut into bite-sized pieces
- 2 Tbsp butter
- 1 tsp kosher salt
- 1 tsp black pepper
- 1 medium onion, chopped
- 1 Tbsp minced garlic
- 2 cups long-grain white rice
- 2 ½ cups chicken broth (or chicken stock for richer flavor)
- 1 (10.5 oz) can cream of chicken soup*
- 2 cups shredded sharp cheddar or colby jack cheese
Instructions
- Brown the chicken – Set Instant Pot to Sauté. Melt butter, then add chicken, seasoning with salt and pepper. Cook 5–8 minutes until lightly browned.
- Sauté aromatics – Add onion and cook until soft, about 3–4 minutes. Stir in garlic and cook for 1 minute, until fragrant.
- Toast the rice – Add rice, stirring to coat in butter and aromatics. Cook 1–2 minutes until slightly golden.
- Add broth & pressure cook – Pour in chicken broth, scraping the bottom to release any browned bits. Secure lid, set to Manual (High Pressure) for 8 minutes.
- Quick release & finish – Once cooking is done, quick release pressure. Stir in cream of chicken soup and cheese until smooth and creamy.
- Serve & enjoy – Dish up hot, optionally with steamed broccoli, peas, or your favorite veggies stirred in.
Notes
- Protein swaps – Try sliced beef, sausage, or even rotisserie chicken.
- Rice options – Use brown rice, increasing cook time to 15 minutes.
- Cheese variety – Gouda, gruyere, pepper jack, or parmesan all work beautifully.
- Veggie boost – Add cooked broccoli, peas & carrots, mushrooms, corn, or cauliflower after cooking.
- Freezer-friendly – Cool completely, freeze in airtight containers, and reheat in the oven at 350°F for 50–60 minutes.
Nutrition Information:
Yield: 8 Serving Size: 1Amount Per Serving: Calories: 443Total Fat: 26gSaturated Fat: 14gTrans Fat: 1gUnsaturated Fat: 9gCholesterol: 118mgSodium: 1009mgCarbohydrates: 16gFiber: 0gSugar: 1gProtein: 34g
Chickenrecipes.blog, occasionally offers nutritional information for recipes contained on this site. This information is provided as a courtesy and is an estimate only. This information comes from online calculators. Although allchickenrecipes.com attempts to provide accurate nutritional information, these figures are only estimates.
Quick FAQ
Can I freeze it?
Yes, it freezes beautifully. Just follow the cooling and reheating tips above.
What’s the total cook time?
From start to finish, about 25–30 minutes — including sautéing and pressure release.
Does it work with other meats?
Absolutely. Try cubed ham, cooked sausage, or even turkey breast.
Try other Instant Pot recipes: