There’s something magical about tearing into a golden, crispy blooming onion with your fingers, dipping the petals into a creamy sauce, and feeling like you’re at a state fair or steakhouse — except you’re right at home, maybe still in pajamas. That’s the beauty of this air fryer blooming onion. It looks impressive, but it’s actually pretty straightforward once you get the hang of slicing it just right.

Why I Started Making These at Home
I used to save blooming onions for special nights out — usually at our local steakhouse or the fair. But let’s be real, this thing doesn’t travel well in takeout containers. The crisp goes soggy and the magic disappears by the time you open the box.
That’s when I started experimenting with making one at home. The deep fryer route felt like a hassle (and my tiny kitchen can’t take the oil smell), so I went straight for the air fryer. And let me tell you, it worked better than expected. You still get that crispy pull-apart texture, minus the mess of a pot full of oil.
What You’ll Need
Let’s talk ingredients — and a few tips I’ve learned from trial and error.
-
Large onion: I go for sweet onions like Vidalia. They’re milder, less tear-inducing, and they caramelize beautifully in the air fryer. Yellow or white onions will work, but you’ll miss that mellow sweetness.
-
Flour: This helps form the base of the crunchy coating. You’ll need a bit extra because the onion’s crevices soak it up fast.
-
Eggs + milk: This mixture binds everything together and gives that golden, fried look without a drop of actual deep frying.
-
Seasoning: My go-to blend is paprika, cayenne, cumin, thyme, oregano, salt, and pepper. It hits all the right flavor notes — warm, smoky, slightly spicy.
-
Spray oil: I use a refillable spray bottle with olive oil or canola. Avoid store-bought aerosol sprays — they can mess with your air fryer’s coating over time.
Kitchen Tip: If you don’t already have a refillable oil spray bottle, it’s worth picking one up. I use it for everything from roasted veggies to air fryer wings.
Let’s Talk About the Cut
I won’t lie — the slicing part is where most folks get nervous. But with a steady hand and a sharp knife, it’s totally doable.
Here’s how I do it:
-
Slice ½ inch off the top of the onion and peel the outer layers.
-
Place it cut-side down with the root on top — this keeps the whole thing from falling apart.
-
Starting ½ inch from the root, make four evenly spaced cuts, then divide each of those sections into four again. That gives you 16 “petals.”
-
Flip it over and let it rest for five minutes — this helps the petals loosen up naturally. Then gently pull them apart with your fingers to create that blooming shape.
I’ve tried using one of those fancy blooming onion cutters, but honestly, a sharp chef’s knife does the job just fine. Just don’t rush it.
How I Coat It for Maximum Crunch
This part gets messy, and that’s totally fine. Just embrace it — maybe wear an apron.
-
Mix the flour and spices in a bowl.
-
Set the onion (cut side up) in another bowl, then sprinkle the flour mix over it. Use your hands to gently push the flour between the petals.
-
Flip it and tap off the extra — you’ll use that flour again.
-
In a separate bowl, whisk the eggs, milk, and a splash of water.
-
Dunk the floured onion in the egg mixture, making sure every nook gets wet.
-
Flour it again. This second coat really helps lock in the crunch.
You don’t want a thick layer of batter — too much and it won’t crisp evenly. A light but full coating is key.
Why Preheating Your Air Fryer Matters Here
I usually skip preheating for frozen fries or reheating leftovers, but not this time. Starting with a hot basket helps the onion start crisping right away instead of steaming.
Set your air fryer to 350°F and give it a good 10 minutes to heat up.
While that’s happening, pop the coated onion into the fridge. That little chill helps firm up the coating and makes it easier to handle.
Time to Cook It
Use a foil sling! Trust me on this — I learned the hard way after trying to place a blooming onion into a hot air fryer with tongs. Not fun.
-
Spray the onion generously with oil. Focus on any pale spots that still look floury.
-
Lower it into the basket using the foil sling.
-
Air fry at 350°F for 20 minutes, spraying again halfway through.
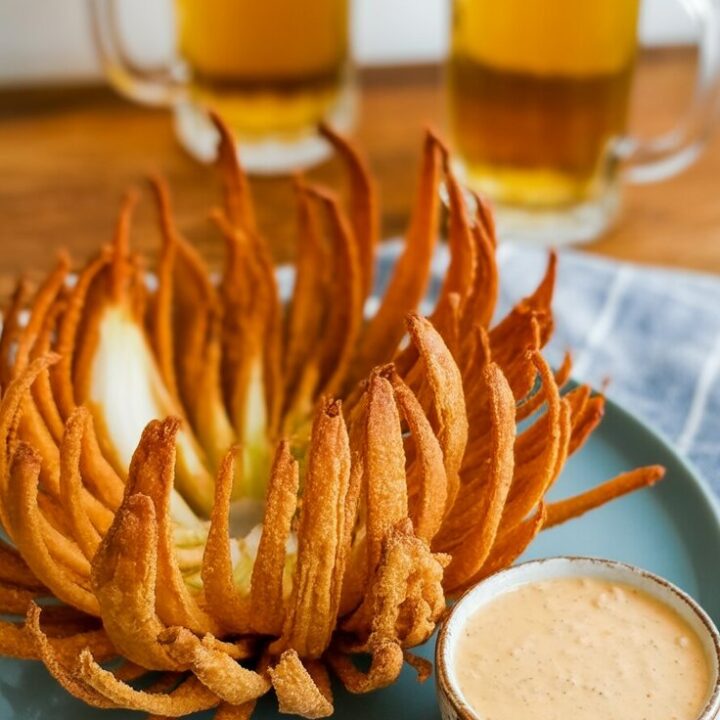
You’re looking for deep golden color on the tips and crisp edges all over. If it’s still looking pale, give it another 2–4 minutes. But keep an eye on it — it can go from golden to scorched pretty quickly.
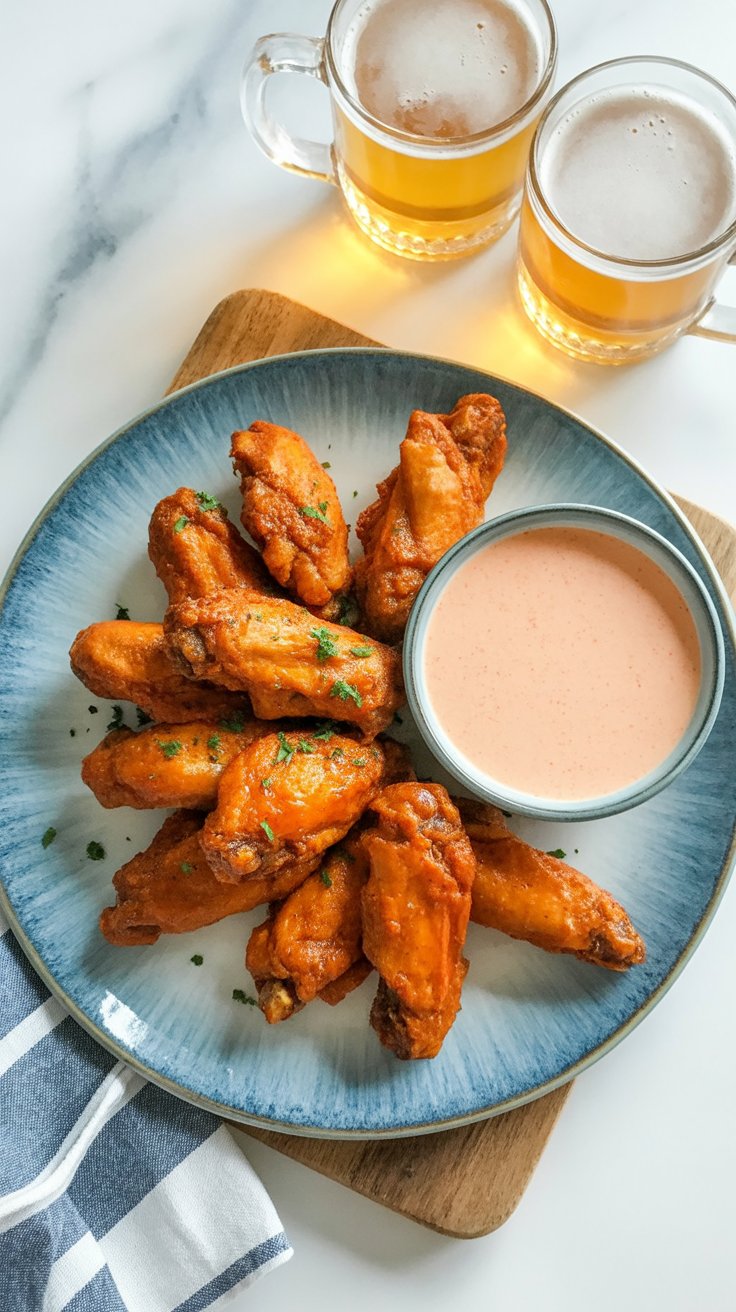
Serving It Up Just Right
As soon as it’s done, let it cool for a minute, then bring it to the table while it’s still warm. I usually serve mine with a homemade dipping sauce that tastes like the kind from chain steakhouses — creamy, tangy, a bit spicy.
But honestly, you can get creative here. Ranch, honey mustard, spicy mayo, or even a smoky cheese sauce — it all works.
Hosting Tip: If you’re having people over, this makes a killer appetizer. Just make sure to serve it right out of the air fryer so the crunch doesn’t fade.
More Ideas and Tips
-
Want to prep it ahead? You can slice and coat the onion up to 6 hours in advance. Just keep it chilled and loosely covered in the fridge.
-
Need it spicier? Add more cayenne or even a pinch of chili flakes to the flour mix.
-
Short on time? Skip the second flour dip. It won’t be as crispy, but it’ll still hit the spot.
-
Cleanup tip: Line your prep area with parchment paper or newspaper — it makes cleanup way easier once the flour starts flying.
How to Store Leftovers (If You Have Any)
To be honest, we rarely have leftovers of this one — but if you do, store the onion in an airtight container in the fridge. It’ll keep for about a day or two. Reheat it in the air fryer at 350°F for 4–6 minutes to get that crunch back.
Microwaving it? I wouldn’t. It’ll just go soggy and limp.
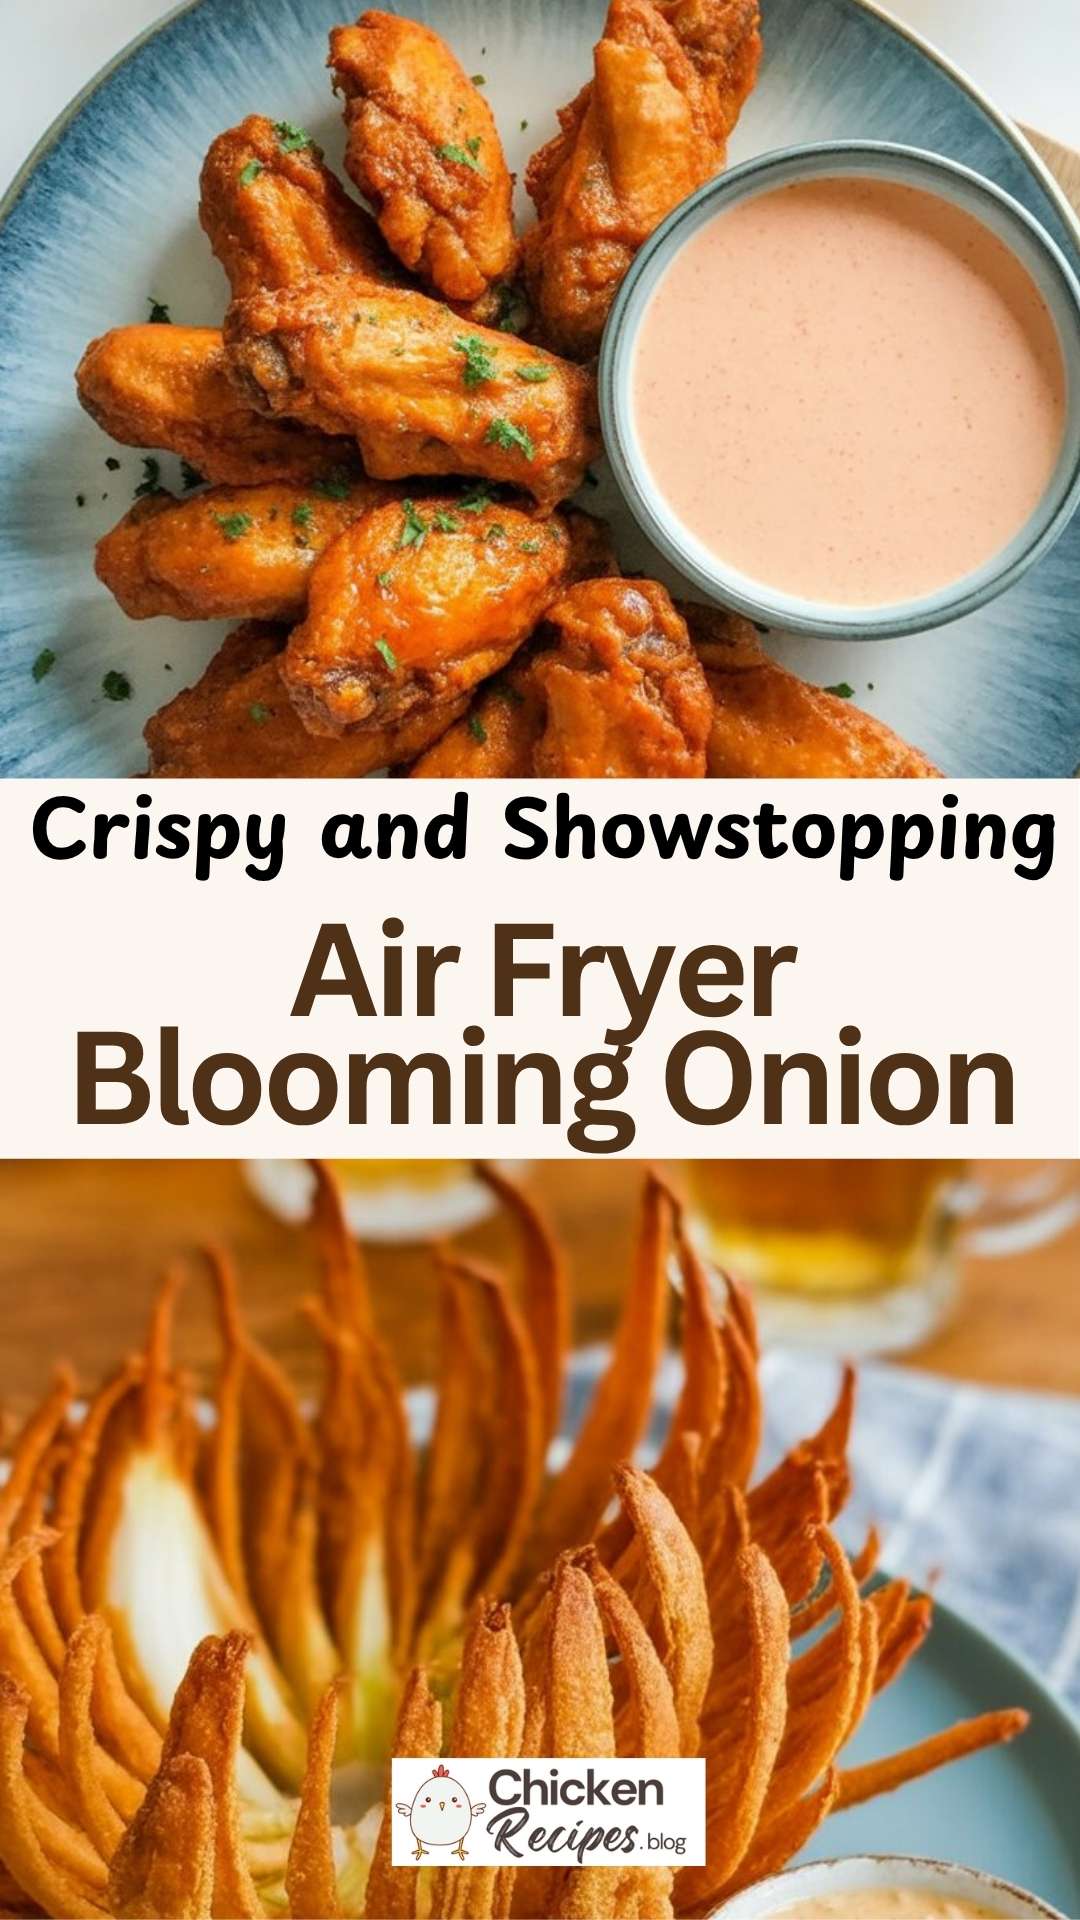
Air Fryer Blooming Onion
This crispy air fryer blooming onion is the ultimate homemade appetizer that looks impressive but is surprisingly easy to pull off. It’s perfect for game day, parties, or anytime you’re craving a restaurant-style snack without deep frying.
Ingredients
- 1 large sweet onion
- 2 large eggs
- 1 cup milk
- 1 cup water
- 2½ cups all-purpose flour
- 1 tablespoon paprika
- 1 teaspoon cayenne pepper
- ½ teaspoon ground cumin
- ½ teaspoon dried oregano
- ½ teaspoon dried thyme
- Salt and freshly cracked pepper, to taste
- Oil spray (for cooking)
Instructions
- Begin by trimming about half an inch off the top of the onion and peeling away the skin. Set the onion cut-side down on your cutting board. Starting about half an inch from the root, make four vertical cuts down to the board to quarter it. Then make three more cuts between each section, ending up with around 16 petals.
- Turn the onion upright and gently tease the petals apart with your fingers. Let it sit for 5 minutes to help it naturally open up.
- In a large mixing bowl, combine the flour, paprika, cayenne, cumin, oregano, thyme, and a generous pinch of salt and pepper. In a separate bowl, whisk together the eggs, milk, and water until smooth.
- Place the prepared onion in a clean bowl, cut-side up. Spoon the seasoned flour all over, working it between each petal. Flip the onion, shake off excess flour, and set the flour aside—you’ll use it again.
- Next, dip the onion into the egg mixture, ensuring it’s fully coated. Let any extra liquid drip off before returning it to the flour bowl. Repeat the coating process, making sure the flour gets into every nook and cranny. Shake off any loose flour.
- Pop the coated onion in the fridge to chill while you preheat your air fryer to 350°F (about 10 minutes).
- Once preheated, remove the onion from the fridge and spray it all over with oil spray. Using an aluminum foil sling for easier lifting, transfer the onion to the air fryer basket, cut-side up.
- Air fry for about 25 minutes, spraying with more oil a couple of times during cooking to make sure there are no dry flour spots. When it’s beautifully golden and crispy, carefully lift it out with the foil and season with extra salt and pepper if needed.
- Serve hot with your favorite dipping sauce—and prepare for it to disappear fast!
Nutrition Information:
Yield: 6 Serving Size: 1Amount Per Serving: Calories: 278Total Fat: 6gSaturated Fat: 1gTrans Fat: 0gUnsaturated Fat: 4gCholesterol: 65mgSodium: 148mgCarbohydrates: 47gFiber: 3gSugar: 5gProtein: 10g
Chickenrecipes.blog, occasionally offers nutritional information for recipes contained on this site. This information is provided as a courtesy and is an estimate only. This information comes from online calculators. Although allchickenrecipes.com attempts to provide accurate nutritional information, these figures are only estimates.
Quick Questions You Might Have
Can I make this with a smaller onion?
Yes! You can scale everything down and make a mini version — great for solo snacks or date nights.
Do I really need a foil sling?
If you like your fingertips, yes. It’s just safer and easier to move the hot onion in and out.
Can I bake this instead?
You can, but it won’t have that same crisp texture. Air frying really is the sweet spot for this recipe.
Is this gluten-free?
Not as written, but you can use a gluten-free flour blend and it should still work fine.
Let me know if you give this one a try. It’s become one of my go-to “impress the guests” kind of recipes — and once you make it a couple of times, it gets easier. Plus, who doesn’t love a good excuse to eat a whole onion and call it an appetizer?
Try other Air Fryer recipes: