If you’re looking for a chicken dinner that gets everyone to the table fast, this crispy panko crusted chicken does the job beautifully. The outside is golden and crunchy with a parmesan-spiced breadcrumb coating, and the inside stays tender and juicy every time.

This is one of those recipes I pull out on busy weeknights when I still want something that feels a little special without much fuss. Whether I’m pairing it with green beans and mashed potatoes or just tossing a quick salad on the side, this chicken never disappoints.
Why This Chicken Is Always a Hit at Home
There’s something about a crispy coating that makes plain chicken feel exciting. When I make this for dinner, I usually hear forks clinking before I even sit down. The parmesan in the crust adds that salty depth, and the panko breadcrumbs keep things light and super crunchy—way better than regular breadcrumbs in my opinion.
You can pan-fry it for that golden crust or bake it for a hands-off option. I’ve done both, and honestly, it depends on how much time I have and how many dishes I want to clean afterward. But whichever way you go, the chicken turns out flavorful and satisfying.
What You’ll Need from the Pantry
Here’s a closer look at the key ingredients and why they matter:
-
Boneless skinless chicken breasts – I usually slice mine in half for quicker, more even cooking. You could also use chicken cutlets if you’re short on time.
-
All-purpose flour – Helps the egg stick and gives the crust a solid base.
-
Egg – Acts like glue between the flour and panko, so everything holds together.
-
Plain panko breadcrumbs – These give you that restaurant-style crunch. Don’t substitute with regular breadcrumbs unless you want a softer coating.
-
Fresh grated parmesan – Skip the powdery kind in a can. The real stuff melts slightly and gives the crust great texture and taste.
-
Garlic powder, onion powder, paprika, salt, and pepper – These basic spices go a long way in making the chicken flavorful on its own.
-
Italian or Cajun seasoning – I switch between the two depending on what kind of dinner I’m going for. Cajun gives it a little kick, while Italian keeps it classic.

Step-by-Step: Here’s How I Make It
1. Get the Chicken Ready
I slice my chicken breasts horizontally so they’re thinner and cook more evenly. If one end is too thick, I give it a few gentle taps with a rolling pin—just enough to even things out, not flatten them into paper.
2. Set Up the Coating Stations
You’ll need three shallow dishes:
-
One for the flour and basic seasonings.
-
One for the egg (beat it lightly with a splash of water).
-
One for the panko, parmesan, and whichever spice blend you’re using.
I like to line them up like an assembly line on my counter to make the process smooth and mess-free.
3. Coat the Chicken
Season the chicken with a little salt and pepper. Dip each piece into the flour, then into the egg, and finally into the breadcrumb mix. Press the crumbs in gently with your hands—they should really stick to the surface.
4. Pan Fry or Bake
If I want that extra crunch, I pan-fry the chicken in a mix of oil and a bit of butter until golden and cooked through. But on lazier days, I line a baking sheet with parchment and bake the chicken at 400°F for 12–15 minutes.
Quick Tip: I always rest the cooked chicken on a wire rack so the bottom doesn’t get soggy from steam. Letting it rest for a few minutes also keeps the juices locked in.

Want to Bake Instead? Here’s What I Do
If I’m trying to cut down on oil or just multitask in the kitchen, I bake the chicken instead of frying. After coating, place the pieces on a parchment-lined sheet and bake at 400°F for around 12 to 15 minutes. The crust won’t be quite as golden as when pan-fried, but it still gets nicely crisp. And the kitchen stays a little cleaner, too.
How to Tell When Chicken’s Done (Without Slicing)
I used to be the person who’d cut into the chicken “just to check” and then end up with a dry piece on my plate. Now, I always use a digital meat thermometer. Just poke it into the thickest part—when it reads 165°F, you’re good to go.
It’s a small investment, but it really makes a difference. Plus, no more second-guessing or overcooking.
Tips That Make a Difference
-
Even thickness is key – If your chicken is too thick in the middle, it’ll take longer to cook and the crust might burn. Pound gently if needed.
-
Use freshly grated parmesan – Pre-shredded cheese can be dry and won’t melt into the crust the same way.
-
Medium heat is your friend – If the pan is too hot, the panko burns before the chicken cooks. I start with medium heat and adjust as needed.
-
Switch up the flavor – Sometimes I go Italian with basil and oregano; other times I spice things up with Cajun seasoning. Both are great.
Easy Sides to Pair With This Chicken
This crispy chicken goes with just about anything. Some of my go-to sides:
-
Mashed potatoes – Creamy, buttery, and classic.
-
Roasted broccoli or green beans – Something green to balance out the richness.
-
Air fryer asparagus – Takes less than 10 minutes and always feels like I put in more effort than I did.
-
Crispy parmesan potatoes – If I’m really leaning into comfort food, I go all in with double crunch.
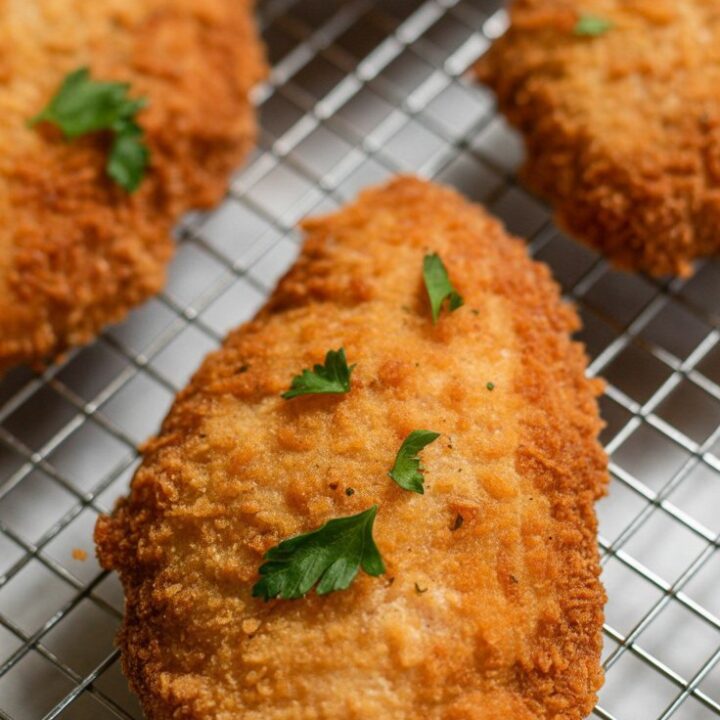
Crispy Panko Crusted Chicken Breasts
These golden, crunchy chicken cutlets are the ultimate weeknight dinner solution.
Ingredients
- 2 boneless, skinless chicken breasts
- ½ cup all-purpose flour
- 1 large egg
- 1 teaspoon paprika
- ½ teaspoon onion powder
- ½ teaspoon garlic powder
- 1 teaspoon Cajun or Italian seasoning
- 1 cup plain panko breadcrumbs
- ½ cup grated parmesan cheese
- 1 ½ teaspoons fine sea salt, divided
- 1 teaspoon black pepper, divided
- 2 tablespoons extra virgin olive oil
- 1 tablespoon butter
- 1 teaspoon water (for egg wash)
Instructions
- Slice each chicken breast horizontally to create two thinner cutlets. Place them between sheets of plastic wrap and gently pound the thicker areas with a meat mallet or rolling pin until evenly flattened.
- Season both sides with ½ teaspoon salt and ½ teaspoon black peppeDredge each cutlet in the seasoned flour, shaking off the excess. Dip into the egg wash, coating both sides completely. Then press the chicken firmly into the panko mixture, ensuring a full, even crust.
- Heat olive oil and butter in a large skillet over medium heat. Once hot, carefully add the chicken pieces. Cook for 3–4 minutes per side until golden and crisp. Lower the heat slightly if the breadcrumbs start browning too fast — the goal is even cooking without burning.
- When both sides are golden and the internal temperature reaches 165°F, remove the chicken and let it rest on a wire rack. This helps keep the crust crispy and prevents sogginess.
Notes
- Fully coat the chicken in egg wash for the breadcrumbs to stick better.
- Keep heat at medium or slightly lower to avoid burning the panko.
- Letting the chicken rest on a rack instead of a plate keeps the coating crisp.
Nutrition Information:
Yield: 4 Serving Size: 1Amount Per Serving: Calories: 424Total Fat: 18gSaturated Fat: 6gTrans Fat: 0gUnsaturated Fat: 10gCholesterol: 116mgSodium: 1303mgCarbohydrates: 35gFiber: 2gSugar: 2gProtein: 29g
Chickenrecipes.blog, occasionally offers nutritional information for recipes contained on this site. This information is provided as a courtesy and is an estimate only. This information comes from online calculators. Although allchickenrecipes.com attempts to provide accurate nutritional information, these figures are only estimates.
This panko crusted chicken has earned a permanent place in my dinner rotation because it’s just so versatile and crowd-pleasing. Whether I’m cooking for myself or trying to impress guests without breaking a sweat, it’s the kind of recipe I know will always come through.
Try other Chicken Breast recipes: