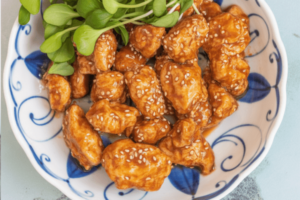
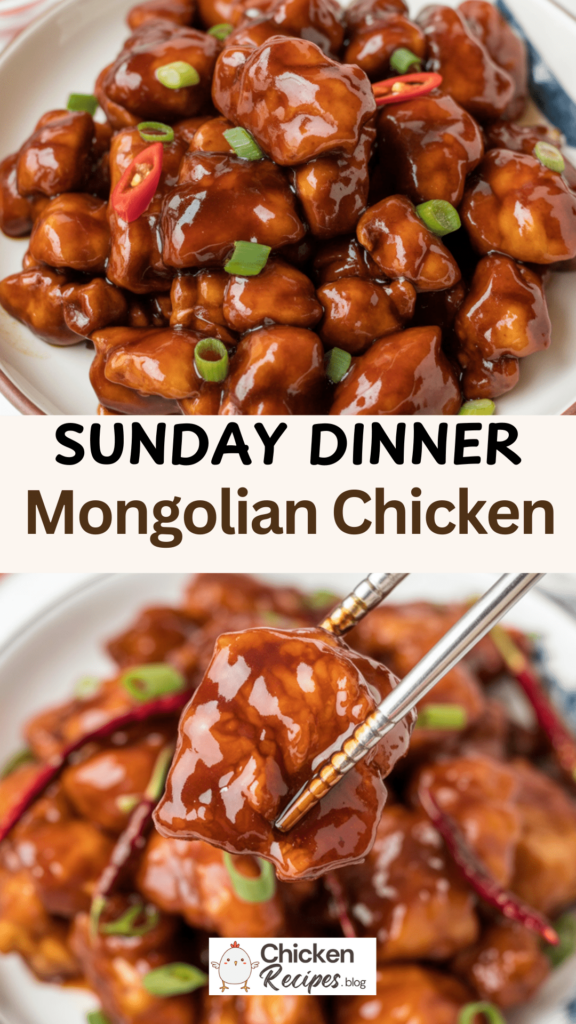
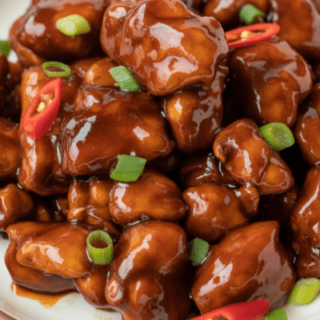
Quick, crispy chicken coated in a sweet, sticky sauce—ready in under 30 minutes. This is my favorite way to recreate that bold, takeout-inspired flavor in my own kitchen with no fuss at all. Perfect for busy weeknights or whenever the craving hits.

What’s in This Homemade Mongolian Chicken?
Whenever someone asks me what makes this dish so addictive, I say it’s all about that sauce. The chicken is lightly coated in cornstarch, fried until golden, and then tossed in a sweet, gingery, garlicky sauce that clings to every bite.
I love using red chili and fresh ginger here for that unmistakable aroma that hits the moment you start cooking. This is my go-to recipe for an easy but impressive dinner that feels like your favorite Chinese restaurant at home.
It’s the kind of meal that begs to be spooned over steaming hot rice with some stir-fried greens on the side.
Ingredients You’ll Need (and My Personal Swaps)
Here’s what I keep in my kitchen for this recipe. These are real, everyday ingredients you can find easily.
- Boneless, skinless chicken thighs – I prefer thighs for their juicy texture, but you can use chicken breast if you want something leaner. Just reduce cooking time slightly to keep it tender.
- Cornstarch – This gives the chicken that classic crispy coating. Potato starch works in a pinch.
- Neutral oil – I use sunflower or canola oil. You want something with a high smoke point to avoid burning.
- Garlic and fresh ginger – Don’t skip fresh. It makes all the difference.
- Red chili – For gentle heat. I often deseed them if I’m cooking for family members who aren’t fans of spice.
- Soy sauce – I’ve used both regular and low-sodium, depending on what’s in the pantry.
- Hoisin sauce – Adds depth and sweetness.
- Brown sugar – Light or dark, whatever you have.
- Sesame oil – Just a touch for that nutty finish.
- Cold water (or chicken stock) – For the slurry to thicken the sauce.
My little tip: Asian grocery stores are great for getting affordable, authentic hoisin or soy sauces.
For dietary swaps:
- Gluten-free? Use tamari or coconut aminos, and check that your hoisin is gluten-free.
- Vegetarian? Extra-firm tofu works beautifully instead of chicken.
My Best Tips for Getting That Takeout-Style Finish
I’ve cooked this dish so many times for weeknight dinners and even quick lunches. These are the little things I do to make it work every time:
- Prep everything first. This recipe moves fast once you start. Chop, measure, and have it all ready to go.
- Leave the chicken a bit damp. The moisture helps the starch stick better, which means crispier chicken.
- Dice evenly. Uneven pieces can lead to overcooked or undercooked bits.
- Use a heavy pan. I usually grab my cast iron—it keeps the oil at the right temperature.
- Check your oil heat. I don’t always use a thermometer. Instead, I stick a wooden chopstick in the oil—if it bubbles, it’s ready.
- Fry in batches. Overcrowding the pan drops the temperature and you lose that crispy finish.
- Space out the chicken in the pan. Let each piece build a crust instead of steaming.
- Drain on a rack or paper towels. This step really prevents sogginess.
When I skip these, I can always tell—the coating doesn’t hold up, or the sauce turns it to mush.
Step-by-Step Cooking Directions
Here’s exactly how I make this at home:
- In a small bowl, stir 1 tablespoon cornstarch with ½ cup cold water until smooth. Set it aside.
- Cut chicken thighs into roughly 1.5-inch pieces. Don’t pat them too dry—you want them a bit moist.
- Toss the chicken with cornstarch in a big bowl until evenly coated. If it’s patchy, add a bit more cornstarch.
- Heat oil in a large pan over medium-high. Fry chicken in batches, about 5-7 minutes per batch, until golden and crisp. Move to a wire rack or paper-towel-lined plate. Keep just a little oil in the pan afterward.
- Lower heat to medium. Add garlic, ginger, and red chili. Cook for 10 seconds to release their aromas.
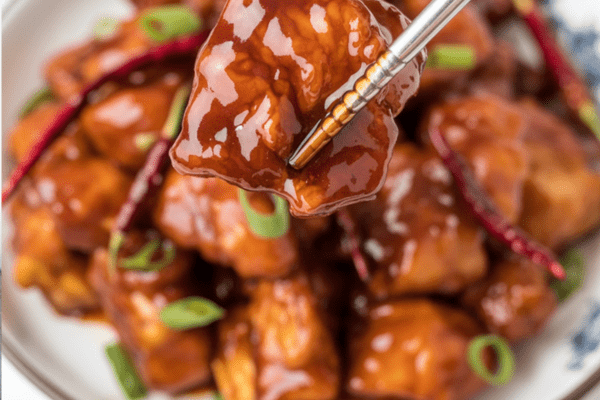
- Add hoisin, soy sauce, brown sugar, sesame oil, and stir well. Pour in the cornstarch slurry (give it another stir first). Simmer gently until it thickens.
- Toss the fried chicken back in and stir to coat it thoroughly.
- Take it off the heat and transfer to a serving dish. Top with extra sliced chili and green onion if you like.
I usually serve immediately while it’s sticky and hot—that sauce is just begging to be scooped up with rice.
Keeping Leftovers Tasty
This dish reheats really well.
- Fridge: Store in an airtight container for up to 4 days. I microwave for 2-3 minutes or warm in a pan over medium heat.
- Freezer: It freezes fine for up to 3 months. I use a freezer bag. Just defrost overnight in the fridge and reheat as usual.
Personally, I think it’s best fresh, but if you’re prepping lunches for the week, this holds up better than a lot of stir-fries.
My Favorite Ways to Serve This Dish
Whenever I make this, I love to go all-in on the takeout theme at home.
- Starters – Egg rolls, crab rangoon, egg drop soup. It really makes dinner feel special.
- Rice or Noodles – Plain rice is classic, but fried rice, lo mein, or even cauliflower rice are all great.
- Veggies – I usually stir fry bok choy or green beans with garlic while the chicken’s cooking.
- Other proteins – Great with Mongolian beef or something like honey walnut shrimp if you want a full spread.
It’s honestly one of those dishes that turns a simple dinner at home into something everyone gets excited about.
Common Questions I Get
Can I make it ahead of time?
Absolutely. I sometimes make the whole thing in the afternoon if I know the evening will be busy. Just store it in the fridge and reheat in a pan or microwave.
Can I use other proteins?
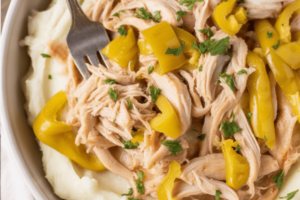
Yes! Shrimp, beef strips, pork slices, or tofu all work really well. Adjust cooking times as needed.
Can I add vegetables?
For sure. Bell peppers, broccoli, snap peas, carrots—anything you like. I often add them in with the sauce stage so they pick up all that flavor.
Can I air fry the chicken?
I do this when I want less oil. Just spray the air fryer basket with oil, place coated chicken in a single layer (you might need batches), spray lightly again, and air fry at 400°F for 10–14 minutes until crispy.
Why is it called Mongolian Chicken?
Fun fact—it’s not actually Mongolian. The name comes from the style of cooking popularized in Taiwanese Mongolian barbecue restaurants. The technique stuck, even if the origin is different.
Mongolian Chicken
Golden-crisp chicken smothered in a glossy, sweet-savory sauce—this homemade Mongolian Chicken is pure comfort in every bite.
Ingredients
- 1 lb skinless boneless chicken thighs
- ¼ cup cornstarch or as needed (or sub with potato starch)
- ⅓ cup vegetable oil or any neutral oil
- 2 cloves garlic minced
- 1 red chili pepper sliced (optional)
- 5 slices ginger
- 4 tablespoon hoisin sauce
- 2 tablespoon regular soy sauce
- 2 tablespoon brown sugar
- 2 teaspoon sesame oil
Cornstarch Slurry:
- 1 tablespoon cornstarch or sub with potato starch)
- ½ cup water
Optional Garnishes:
- 1 green onion finely chopped
- 1 red chili pepper sliced
Instructions
- Make the Slurry: In a small bowl, whisk together 1 tablespoon cornstarch with ½ cup water until smooth. Set aside.
- Prep the Chicken: Cut the chicken thighs into bite-sized pieces, about 1.5 inches each. No need to pat dry—moisture helps the starch stick.
- Coat the Chicken: Add the chicken pieces to a mixing bowl and toss with ¼ cup cornstarch until each piece is evenly coated. If it looks patchy, feel free to sprinkle on a little extra starch.
- Fry the Chicken: Heat the oil in a large skillet or wok over medium-high heat. Once hot, fry the chicken in small batches until crispy and golden on both sides—about 6 to 8 minutes. Transfer the cooked pieces to a paper towel-lined plate or wire rack to drain excess oil.
- Make the Sauce: Discard most of the remaining oil, leaving about a teaspoon. Over medium heat, sauté the ginger, garlic, and sliced chili (if using) for 10 seconds—just until fragrant.
- Add the Sauce Ingredients: Stir in the hoisin sauce, soy sauce, brown sugar, and sesame oil. Mix well. Give the cornstarch slurry another quick stir and pour it into the pan. Let the sauce simmer until it thickens slightly and becomes glossy.
- Combine & Serve: Return the fried chicken to the pan and toss to coat in the sauce. Once everything is well combined, remove from heat. Plate it up and garnish with chopped green onions and extra chili slices if you like a little heat.
Nutrition Information:
Yield: 3 Serving Size: 1Amount Per Serving: Calories: 1086Total Fat: 59gSaturated Fat: 12gTrans Fat: 0gUnsaturated Fat: 44gCholesterol: 241mgSodium: 1752mgCarbohydrates: 83gFiber: 5gSugar: 20gProtein: 60g
Chickenrecipes.blog, occasionally offers nutritional information for recipes contained on this site. This information is provided as a courtesy and is an estimate only. This information comes from online calculators. Although allchickenrecipes.com attempts to provide accurate nutritional information, these figures are only estimates.
If you’re looking for an easy way to shake up your dinner routine, I can’t recommend this recipe enough. It’s fast, fun, and really hits those nostalgic takeout notes without leaving home.
Try other Chicken recipes: