Do you find yourself reaching for that store rotisserie chicken every time you shop? I get it. I used to do the same, thinking it was this unbeatable shortcut. But once I started roasting my own at home, there was no going back.
This homemade rotisserie-style chicken is so juicy, tender, and full of flavor, it really spoils you for the supermarket version. Plus, you control what goes on it—no mystery seasoning packets or weirdly salty skin.
Let me walk you through how I make mine on the pellet grill. Don’t worry if you’re new to grilling like I once was—I promise it’s way simpler than it sounds.
Why This Recipe is a Favorite in My Kitchen
When I was a kid, my dad would do rotisserie chicken on special weekends. He’d bring it to the table perfectly carved, while my mom made a simple cucumber salad and some rice or pasta. Those dinners felt like a celebration even though they were so easy.
Now, making it at home is my own little tradition. I use a pellet grill (which I got after a long debate with myself) and I love how easy it is. I can even keep an eye on the temperature on my phone while prepping the sides inside.
But really, it’s the flavor that convinced me. The slow spin, gentle smoke, and butter basting give you a golden, crispy skin with moist meat all the way to the bone. Every time I make it, I feel like I’m recreating those childhood weekend meals with a little upgrade.
What You’ll Need
Here’s what I use when I make my rotisserie chicken. Nothing fancy, just solid basics:
- Paprika – adds a warm, earthy color and subtle flavor. I sometimes swap in smoked paprika for a more pronounced grilled taste.
- Garlic salt – you could use fresh garlic mixed with salt if you prefer, but I like the convenience.
- Kosher salt – the big flakes help season evenly.
- Freshly cracked black pepper – don’t go for pre-ground if you can help it; the fresh stuff really pops.
- Roasting chickens (about 4 pounds each) – I usually get two for a crowd or one if it’s just family dinner.
- Butter – for basting. Don’t skip this; it keeps the skin so moist.
I often tweak the seasonings based on mood—sometimes I throw in a little cayenne if I want heat, or some dried herbs if I want it herby. Don’t be afraid to play around.
How I Make It at Home
This is how I do it on my pellet grill with the rotisserie attachment:
- Get the grill hot. Preheat to 500°F. Pat the chicken dry really well with paper towels. Dry skin = crispier skin.
- Season the chicken. Mix the paprika, garlic salt, and pepper. Half goes straight onto the chickens, making sure you coat every bit of skin.
- Butter prep. Melt the butter and stir in the other half of the seasoning mix. This will be your basting sauce.
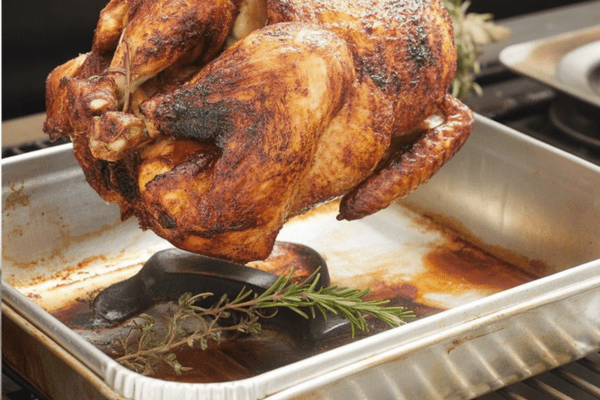
- Load it up. Carefully skewer the chickens onto the rotisserie spit. Double-check that they’re secure so they don’t flop around.
- Start cooking. Let it spin at 500°F for about 25 minutes. Then lower the heat to 350°F.
- Baste regularly. Every 15 minutes, brush on that seasoned butter. This step is what gives you that gorgeous golden color and juicy texture. Keep basting until you use it all.
- Check doneness. The internal temp should be at least 165°F, and juices should run clear. If the chickens are larger or smaller, just adjust time accordingly. I always use a meat thermometer—so much better than guessing.
- Rest before carving. Take them off the spit and tent with foil for 10 minutes. This resting time keeps the juices from running all over the cutting board.
We usually eat it straight off the carving board in the kitchen. I’m not even kidding.
My Best Rotisserie Chicken Pointers
Here are a few personal notes I’ve picked up making this over and over:
- Truss if you can. It isn’t required, but tying the legs with kitchen twine keeps things neat and evenly cooked. I do it when I want it to look nice on the table.
- Baste like your life depends on it. Dry chicken is sad chicken. That butter baste is what makes the skin crispy without drying the meat.
- Spacing matters. If you’re cooking more than one chicken, make sure there’s room between them on the spit so the hot air can circulate. Overcrowding just steams them.
- Catch those drippings. I put a foil tray underneath to catch the drips. Saves a ton of cleanup. Sometimes if there’s enough, I make a quick pan gravy out of them. No waste.
These are the little things that make a big difference in getting it just right.
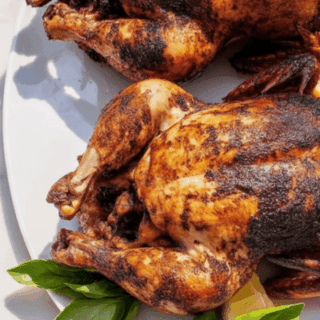
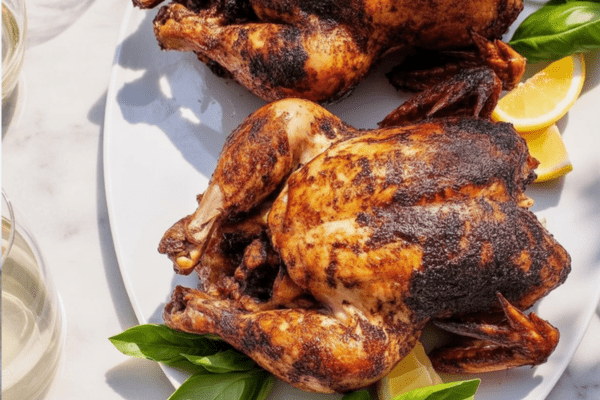
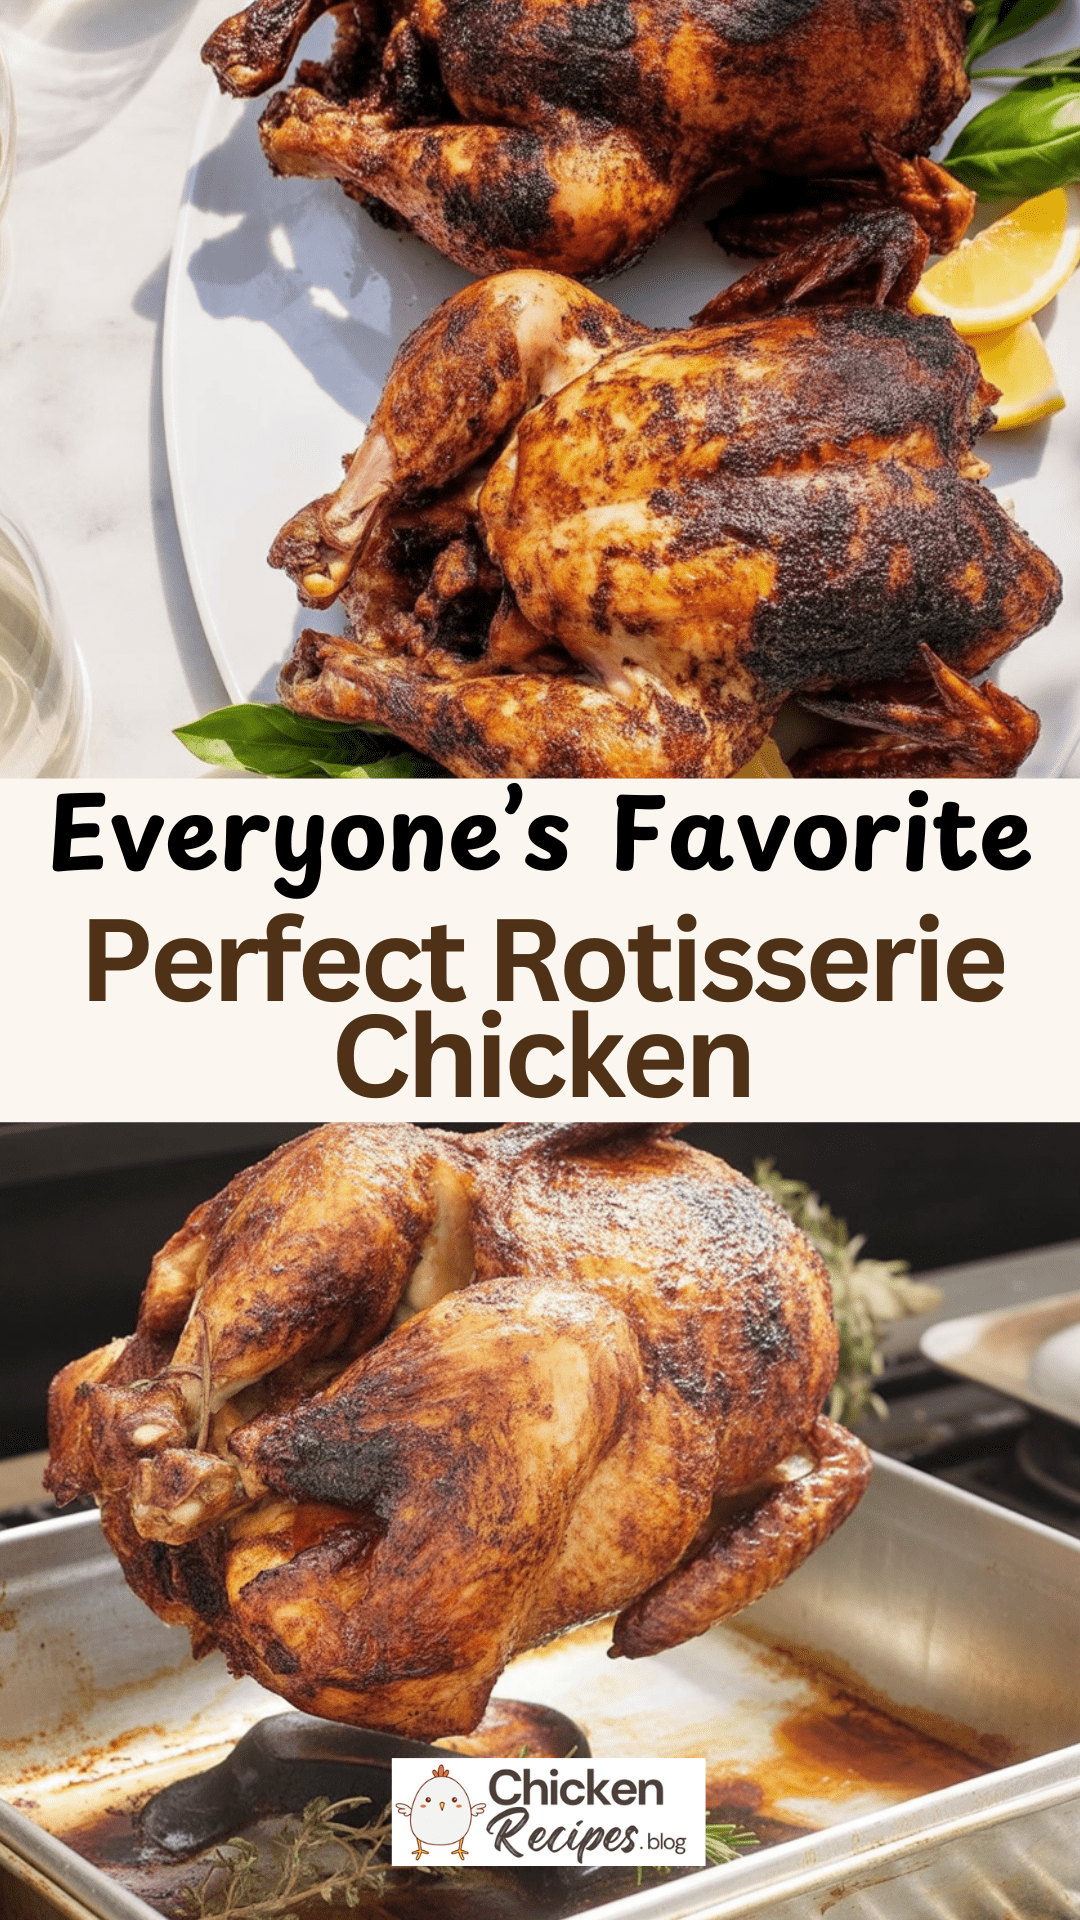
Perfect Rotisserie Chicken
Few things rival the comfort and aroma of a perfectly roasted chicken turning slowly on a rotisserie. With golden, crisped skin and juicy, flavorful meat, this recipe brings the magic of your favorite store-bought bird right into your own backyard.
Ingredients
- ½ cup melted butter
- 4 tablespoons paprika
- 2 teaspoons kosher salt
- 4 teaspoons garlic salt
- 1 teaspoon freshly cracked black pepper
- Two whole roasting chickens (about 4 pounds each)
Instructions
- Prep the Grill: Fire up your pellet grill with the rotisserie attachment and set it to 500°F. While it heats, pat the chickens completely dry with paper towels. This helps the seasoning stick and gives that skin a chance to crisp beautifully.
- Season the Bird: In a bowl, combine the paprika, garlic salt, kosher salt, and black pepper. Rub half of this spice blend generously over both chickens, making sure every surface is well-coated.
- Spice Up the Butter: Stir the remaining spice mix into your melted butter—this flavorful baste will build layers of taste as the chicken cooks.
- Mount and Roast: Secure the chickens onto the rotisserie spit, ensuring they’re balanced for even cooking. Begin roasting with the grill lid closed. After 25 minutes, reduce the heat to 350°F.
- Baste and Rotate: Open the lid and brush the chickens with the spiced butter. Continue basting every 15 minutes, using up all the butter as the birds rotate and develop a golden, crispy crust.
- Check for Doneness: The chickens are ready when an internal thermometer reads 165°F and the juices run clear. Timing may vary slightly depending on bird size, so trust your thermometer.
- Rest and Serve: Carefully remove the chickens from the spit and let them rest, loosely tented in foil, for about 10 minutes. This locks in all those juices before carving.
Nutrition Information:
Yield: 8 Serving Size: 1Amount Per Serving: Calories: 472Total Fat: 32gSaturated Fat: 13gTrans Fat: 0gUnsaturated Fat: 16gCholesterol: 162mgSodium: 1323mgCarbohydrates: 3gFiber: 1gSugar: 0gProtein: 42g
Chickenrecipes.blog, occasionally offers nutritional information for recipes contained on this site. This information is provided as a courtesy and is an estimate only. This information comes from online calculators. Although allchickenrecipes.com attempts to provide accurate nutritional information, these figures are only estimates.
Frequently Asked Questions
Do I need a pellet grill?
Not strictly. You can do this on any grill with a rotisserie attachment. Just adjust temps as needed. I love my pellet grill for the smoke flavor and easy temp control, but use what you have.
Can I change the spices?
Absolutely. This is my go-to base, but I often mix it up. Try herbs, lemon zest, cayenne—whatever you like.
How do I know it’s done?
Always use a meat thermometer. You want 165°F at the thickest part of the breast. No guessing. It’s foolproof.
What do you serve with it?
My personal favorites are a crisp cucumber salad and some buttered rice, just like my mom did. But honestly, it goes with anything—roasted potatoes, pasta, even a big green salad.
Try other Chicken recipes: