I’ve made chicken breast every which way over the years — grilled, poached, pan-fried — but this crispy oven-roasted version is the one I keep coming back to. The skin gets golden and crackly, the meat stays juicy, and the flavor is so good you can get away with minimal seasoning.
 It’s also the kind of recipe you can count on for weeknight dinners and Sunday family meals. I’ve made it for quick salads, shredded it for sandwiches, and served it alongside mashed potatoes when I want something comforting but fuss-free.
Why This Recipe Works So Well
The biggest reason? You’re cooking it just until it’s done — not a minute longer. Overcooking is what makes chicken breast turn out dry and chewy. I pull mine from the oven at 160°F, let it rest, and by the time it’s ready to slice, it’s perfectly cooked. That little rest also gives you time to pour a drink or toss a salad without rushing.
My Go-To Temperature Tip
I used to guess if my chicken was done, and it worked… maybe half the time. Now, I don’t play chicken with chicken — I use a thermometer every time. My kitchen drawer has both an instant-read thermometer for quick checks and a leave-in probe thermometer for “set it and forget it” cooking. The leave-in kind is great if you don’t want to keep opening the oven and letting heat escape.
How I Season It
I keep the seasoning simple: salt, pepper, and a touch of paprika or garlic powder if I’m in the mood. I skip dried herbs for this recipe because they tend to burn during the initial pan sear. If I want herby chicken, I add fresh herbs after cooking — chopped parsley or thyme scattered over the top just before serving.
Brining: Worth It or Skip It?
If you have the time, brining the chicken breasts for a few hours makes them even juicier and more forgiving if you accidentally cook them a little longer. I use a simple brine of water, salt, and sometimes a touch of sugar. But on busy nights, I skip it, and the chicken is still tender as long as I watch the temperature closely.
 Tips and Tricks for the Best Crispy Roasted Chicken
-
Pat the chicken dry before seasoning — moisture is the enemy of crisp skin.
-
Start skin-side down in a hot oven-safe skillet or pan for that golden sear.
-
Spoon hot oil over the chicken in the pan before it goes into the oven — it helps render the fat and crisp the skin.
-
Use a wire rack after cooking so the skin stays crisp instead of steaming on a plate.
-
Rest the meat for 5–10 minutes so the juices redistribute.
Make Ahead Advice
You can season the chicken and keep it in the fridge for up to a day before cooking. If you’re brining, do it earlier in the day or overnight. Once cooked, the chicken can be sliced and stored in an airtight container for easy meal prep — think salads, wraps, or reheated dinners later in the week.
Serving Ideas
This chicken is a chameleon — it goes with almost anything. Some of my favorites:
-
With roasted vegetables and potatoes for a classic dinner.
-
Sliced over Caesar salad for a lighter meal.
-
Chopped into a pasta dish with olive oil, garlic, and parmesan.
-
In sandwiches with a smear of mayo and crisp lettuce.

 Storage
Cooked chicken breasts will keep in the fridge for about 3–4 days in an airtight container. You can reheat them in the oven at a low temperature to keep the meat moist. The skin won’t be as crisp, but you can broil it briefly to bring back some crunch.

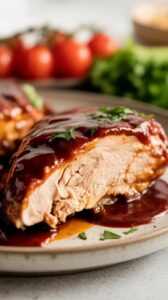
Roasted Bone-in Chicken Breast
Golden, crackling skin and tender, juicy meat—this bone-in chicken breast delivers the kind of flavor and texture you’d expect from a Sunday roast, with simple everyday ingredients. Perfect for a comforting weeknight dinner or an elegant main dish for guests.
Ingredients
- 2 bone-in, skin-on chicken breasts
- ½ tablespoon olive oil
- 1 teaspoon salt (reduce to ½ teaspoon if chicken has been brined)
- ½ teaspoon garlic powder or granulated garlic
- ½ teaspoon freshly ground black pepper
- 1 teaspoon dark chili powder
- ½ cup cooking oil (olive, canola, or vegetable)
Instructions
- Optional Brining: For extra juiciness, brine the chicken breasts in a simple saltwater solution for 2–4 hours before cooking. Pat dry before seasoning.
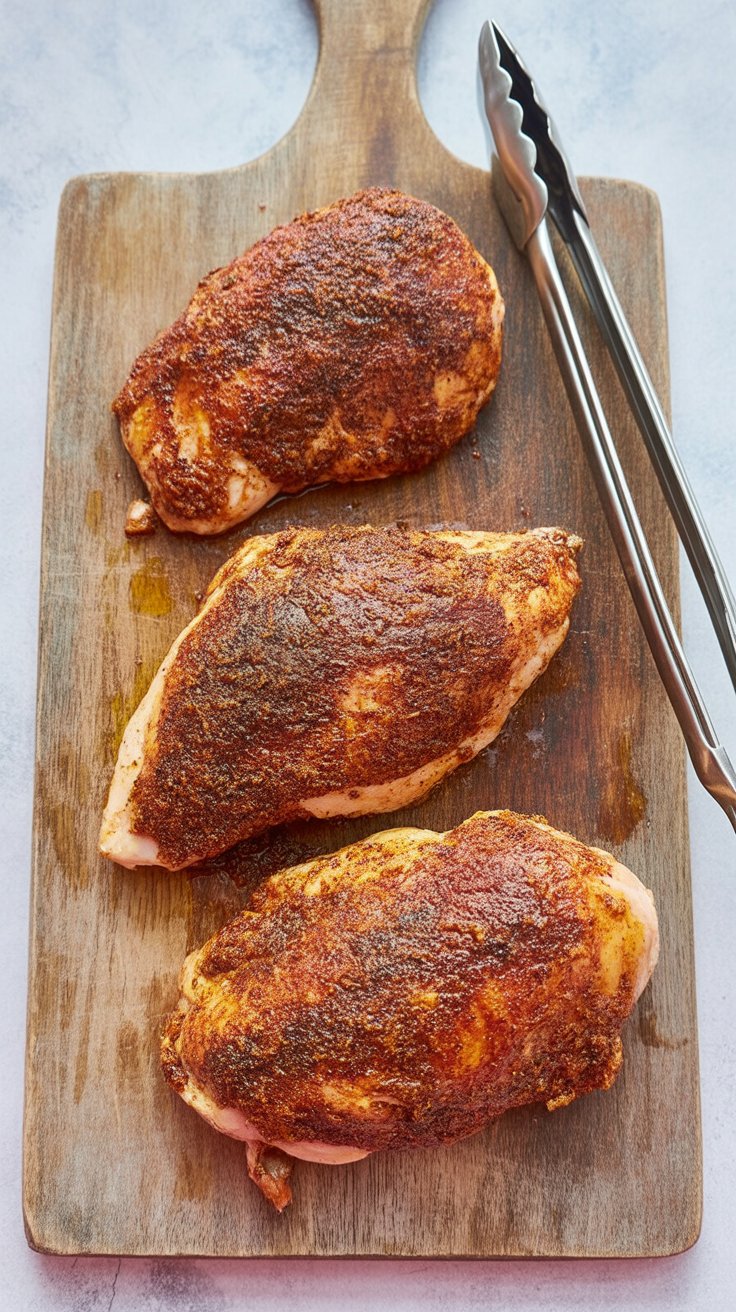
- Preheat & Season: Heat oven to 400°F. Pat chicken completely dry with paper towels. Rub olive oil all over each breast. Sprinkle evenly with salt, garlic powder, pepper, and chili powder, pressing gently so the seasoning adheres.
- Sear for Crispy Skin: Line a baking sheet with foil and place a wire rack on top. Heat the ½ cup cooking oil in a large skillet over medium-high heat until shimmering. Place chicken skin-side down and sear for 2 minutes, then flip and sear the other side for another 2 minutes.
- Roast to Perfection: Transfer chicken to the prepared baking sheet, skin-side up. Spoon about 1 tablespoon of the hot oil from the skillet over each breast. Roast for about 45 minutes, or until the internal temperature reaches 160°F.
- Rest & Serve: Let the chicken rest for 5 minutes before serving. The temperature will rise slightly as it rests, ensuring juicy, tender meat.
Nutrition Information:
Yield: 2 Serving Size: 1Amount Per Serving: Calories: 538Total Fat: 60gSaturated Fat: 4gTrans Fat: 0gUnsaturated Fat: 53gCholesterol: 0mgSodium: 1098mgCarbohydrates: 3gFiber: 1gSugar: 0gProtein: 1g
Chickenrecipes.blog, occasionally offers nutritional information for recipes contained on this site. This information is provided as a courtesy and is an estimate only. This information comes from online calculators. Although allchickenrecipes.com attempts to provide accurate nutritional information, these figures are only estimates.
Common Questions
Can I use boneless, skinless chicken breasts?
Yes, but they cook faster, so check them earlier to avoid overcooking. You’ll miss the crispy skin, though.
Do I need to flip the chicken while roasting?
No — once you’ve seared it in the pan, the oven takes care of the rest.
Can I make this in an air fryer?
Absolutely. Just lower the cooking time and check the temperature often — the air fryer runs hotter and cooks faster.
Try other Chicken Breast recipes: